How do I edit the CSS?
We’ve built our themes to be extremely customizable right from the Theme Editor, but we definitely understand that sometimes you need to add a bit of custom CSS to get your store looking exactly how you want it.
Whether you’re making small tweaks or working on a larger custom project, here is our updated guide on the best ways to add CSS to your Eight theme.
How do I edit the CSS?
If you need to add custom CSS, Shopify provides several ways to do this—ranging from easy built-in settings to editing the theme code directly.
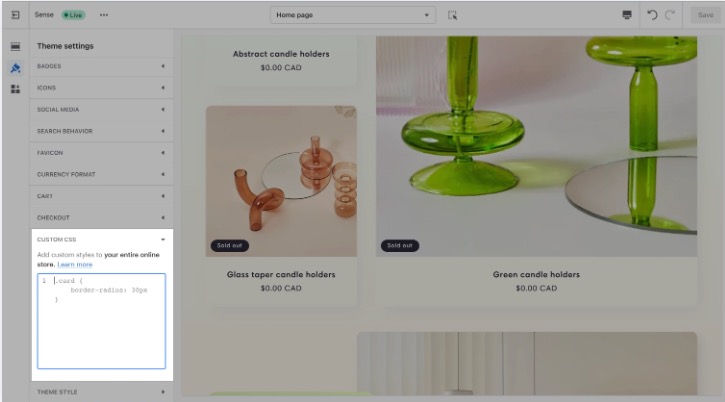
Option 1: Add Custom CSS to your entire theme (Site-wide)
This is the best method for changes that should affect your whole store (for example, changing the style of all buttons or headings). This affects all pages except the Checkout page.
- From your Shopify admin, go to Online Store > Themes.
- Click Customize next to the theme you want to edit.
- Click Theme settings (the gear icon on the left sidebar).
- Click Custom CSS.
- Paste your CSS code into the field.
-
Click Save.

Option 2: Add Custom CSS to a specific section (Scoped CSS)
This method is perfect if you only want your changes to apply to one specific part of a page. This keeps your code organized and prevents it from affecting other areas.
- From your Shopify admin, go to Online Store > Themes.
- Click Customize.
- Click on the specific Section you want to edit (e.g., a Slideshow or Image with Text).
- Scroll to the very bottom of the section settings panel on the right and click Custom CSS.
- Paste your CSS code.
-
Click Save.


Option 3: Making CSS Edits via custom.css (Advanced)
If you have a large amount of CSS or prefer working in the Shopify code editor, you can use a dedicated file.
-
To alter your theme code, access your theme's code editor:
Step 1: Staying in Themes within your Shopify admin, click the button containing three small dots.
Step 2: Click Edit code in the drop-down menu.
- Create the file (if needed): If
custom.cssisn't there, click "Add a new asset," name itcustom.css, and save. - Add Your CSS: Write your code into the file and save.
- Link the file: Open
layout/theme.liquidand ensure the file is being called by adding{{ 'custom.css' | asset_url | stylesheet_tag }}within the<head>section.
Important Notes & Limits
- Character Limits: Shopify limits site-wide Custom CSS to 1,500 characters and section-specific CSS to 500 characters.
- Checkout: Custom CSS does not apply to the Checkout page for security reasons.
- Specificity: Any override to default styles needs selectors that are at least as specific as the current theme selectors to take priority. You can use your browser’s "Inspect" tool to confirm this.
- Theme Updates: Keep in mind that custom CSS is tied to the specific version of the theme you are editing. If you update your theme in the future, you may need to copy your custom CSS over to the new version.
Remember: Customizing your CSS requires some familiarity with CSS and HTML. Before you customize your theme, make sure that you understand what level of support is available.
We’re unable to provide one-to-one support for customizing code. If you need any assistance customizing your theme's code, then we suggest reaching out to a Shopify Expert to help you with the task.
StoreTasker and Shopexperts are recommended partners of Eight Themes - both specializing in website development and offering free quotes for their services.